Introduction
Transforming your garage into a well-functioning and visually appealing space starts with a solid foundation. If you’ve noticed unevenness or dips in your garage floor, don’t fret! In this comprehensive guide, we will delve into the art of garage floor leveling and provide you with easy-to-follow steps to achieve a level surface. Get ready to level up your garage and create a space that’s both practical and aesthetically pleasing.
Understanding the Importance of Garage Floor Leveling
Enhanced Safety
An uneven garage floor can pose safety hazards, such as tripping or stumbling. By leveling your garage floor, you create a smooth surface that reduces the risk of accidents and ensures a safer environment for you and your family.
Improved Functionality
A level garage floor allows for easy maneuverability of vehicles, storage, and other activities. It eliminates the hassle of dealing with uneven surfaces that can hinder the functionality of your garage. With a leveled floor, you can maximize the potential of your space and make the most out of every square foot.
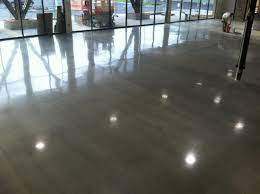
Aesthetic Appeal
An even garage floor adds to the overall visual appeal of the space. It creates a clean and polished look that enhances the aesthetics of your garage. Whether you use your garage solely for parking or as a multi-purpose area, a level floor sets the foundation for a more attractive and organized space.
The Art of Garage Floor Leveling
Assessing the Floor
Start by thoroughly assessing the condition of your garage floor. Identify any areas that require leveling and determine the severity of the unevenness. This assessment will help you plan and execute the leveling process effectively.
Gathering the Tools and Materials
Before you begin the leveling process, gather the necessary tools and materials. This may include a concrete grinder, leveling compound, trowels, safety gear, and measuring tools. Having everything on hand will streamline the process and ensure a smoother experience.
Surface Preparation
Proper surface preparation is key to a successful garage floor leveling project. Clean the floor thoroughly, removing any debris or loose materials. Repair any cracks or damages, ensuring a solid foundation for the leveling compound.
Applying the Leveling Compound
Mix the leveling compound according to the manufacturer’s instructions. Begin applying the compound to the low areas of the floor, gradually building it up to achieve a level surface. Use a trowel or screed board to spread the compound evenly and remove any excess.
Smoothing and Finishing
Once the leveling compound is applied, use a long straightedge or a level to ensure the surface is smooth and even. Make any necessary adjustments or corrections to achieve the desired levelness. Allow the compound to cure as per the manufacturer’s instructions.
Optional: Surface Coating
For added protection and aesthetics, you may choose to apply a surface coating to your leveled garage floor. This could be epoxy, polyurethane, or a decorative concrete overlay. The coating will enhance the durability of the floor while providing a finished look.
Conclusion
Garage floor leveling is an art that can transform your garage from a bumpy and uneven space to a functional and visually appealing area. By understanding the importance of leveling, following the step-by-step process, and taking your time to achieve a level surface, you can create a garage that meets both your practical and aesthetic needs.
So, level up your garage and embark on a journey to create a space that’s safe, functional, and visually impressive. With the art of garage floor leveling, you’ll unlock the true potential of your garage and enjoy a seamless experience.
Leave a Reply